You can easily transform your Raspberry Pi into an awesome little retro-gaming machine.
It supports up to 50 consoles! Such as:
- Nitendo 64
- Game boy
- Atari 2600
- Playstation 1 and 2
- Master System
You can found the full list here
This post relate my experience building a gaming console and it is a complement of the officials documentation. I Hope it will be useful for you!
Material
- Rasberry Pi (3b+ for me)
- A heatsink is a really good idea
- Large SD card > 8go to store your games
- Raspberry power supply is recommanded
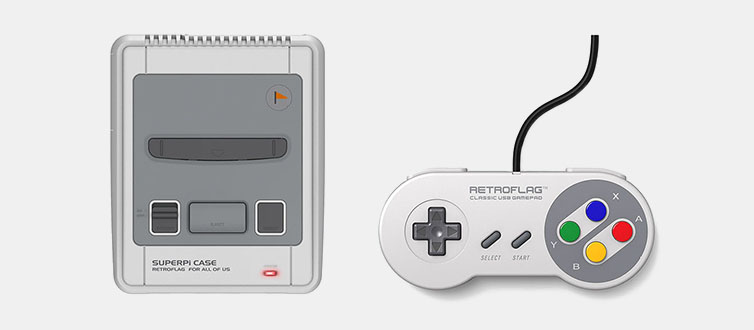
- Nice retro-gaming case (optional)
- Ventilation fan (30mm x 30mm x 7mm) silent as possible
- Controller
- USB snes
- XBOX
- PS3
- USB keyboard for configuration
Distributions
There is tree major solution to turn your Raspberry Pi into a multi-consol retro-gaming station:
- RecalBox
- Easy to set up
- Come with preinstalled games
- RetroPie
- Most popular solution
- Have a nice support
- High level of settings
- Raspbian based
- Lakka
- light way
Theses image can be easily download and flash using etcher.
Note: RetroPie can be also installed on top of an existing Raspbian https://retropie.org.uk/docs/Manual-Installation/
I have test RecalBox and RetroPie, but sadly not Lakka for the moment, here is my feedback.
Recalbox
I have decided to start by trying Recalbox, well because… I have to start somewhere. After buying a brand new 64go sd card, I flashed the 18.07.13 / Raspberry 3 version.
Then spend my morning figuring out why it was not booting, trying with different sd cards, copying the image using dd, then I just randomly read that the Raspberry Pi 3b+ is not supported yet…
So I tried with the dev release, it boot well but I wasn’t able to launch games… (tester release…) Finally, I tried back the stable version with my good old RPi 3b, and I was able to play the preinstalled games.
Issues encountered
- RPi 3b+ not supported yet (and take me a long time to find the issue)
- Wiki not really update
Conclusion
Even with the lot of time I waste due to bad documentation, It is a really beautiful system and I am waiting for the RPI 3b+ support.
RetroPie
Not really happy of trying to make Recalbox work on my Rasberry 3b+, I moved to RetroPie following the well made documentation for the installation:
- Here is the download link for Raspberry 2/3 image.

Controller
On the first boot you have to setup the controller and my SNES Controller is seen as Xbox Controller, but it seem to be not a problem because you can skip buttons you don’t have.
The hotkey is use on shortcut to interact with the emulator, it allow to some extra feature as saving at anymoment. I recommand to set select as Hotkeys.
Emulator shortcuts:
| Hotkeys | Action |
|---|---|
| Select+Start | Exit |
| Select+Right Shoulder | Save |
| Select+Left Shoulder | Load |
| Select+Right | Input State Slot Increase |
| Select+Left | Input State Slot Decrease |
| Select+X | RGUI Menu |
| Select+B | Reset |
Set extra controller
When you plug a new controller you have to set it:
- Open menu with
start - Configure input
Note: If the start button is not working you can follow to procedure on issue chapter, to clear the input configuration.
Install emulators
Emulators are available as packages, to install them:
- Set up internet connection (wifi or LAN)
- Install basic package
Configuration > RetroPie setup > Basic install
- Additional emulator can be found in :
RetroPie setup > Manage packages
Install ROM
The ROMs aka games are not provided with RetroPie. The can be found on internet.
Add ROM
- Download the game form internet
- Decompress the files
- Add the files to the folder corresponding to the console
/roms/<console>/
- Reboot for update the game list
Scrapeto add a description and a picture of the game in the menu
start > scraper > scrape now > start
Note: some games require a BIOS (see: issues bellow)
Keyboard settings
To change the keyboard settings:
F4 to enter in terminal
sudo raspi-config
Localisation Option > Change Keyboard Layout > Choose Generic 101-key PC
Note: If you have swiss french keyboard as me choose
German (Switzerland)then you can selectFrench version
Troubleshooting
Boot in terminal after upgrade
After upgrading the system, it was booting in the terminal:
- Login: pi
- Password: raspberry
sudo ./RetroPie-Setup/retropie_setup.sh
then go to:
Configuration / tools > Splashscren - Configure Splashscreen
set Enable splashscreen on boot to disabled
Now, RetroPi launch if you login in the terminal to firectly boot in RetroPie:
RetroPie setting > Raspi-config > set Boot Options to terminal without login
Reconfigure controller
Now if the start and select buttons are not working, got to:
Configuration / Tools > emulationstation > Clear/Reset Emulation Station input configuration
Then you will have to configure the controller at next boot.
Supertux game not launching
Reason: It require a desktop
Some Playstation game crash
Some Playstation games like Crash Team Racing crash because they require a BIOS file :
- Copy SCPH1001.BIN to /home/pi/RetroPie/BIOS
Safe shutdown with RetroFlag picase
The RetroFlag script provide a safe shutdown functionality:
- Close emulator
- Wait 3s
- Shutdown
Install
For RetroPie
- Connect to the internet
- Enter in terminal F4
wget -O - "https://raw.githubusercontent.com/RetroFlag/retroflag-picase/master/install.sh" | sudo bash